
Updated on January 23, 2018
Lesser Known Men’s Fashion Accessories
Despite the commonly held belief that men’s fashion accessories are relegated to a belt, watch, and tie, men have far more options says Dev Randhawa. Following are a few lesser known items that can accent any look.
A compelling substitute for a standard neck tie, a concrete or marble bow tie, is sure to stand out. If sticking with a standard tie, a tie chain is a stylish and functional alternative to a tie clip. In addition to bringing elegance to an ensemble, the chain keeps the tie down while allowing freedom of movement against the shirt, preventing a tie from bulging as one moves. To keep things dressy without a tie, a collar chain provides a little extra interest and can be worn with or sans tie. If the chain feels like too much, consider the more subtle collar pen. Earrings are in vogue for both sexes, but many men do not want to commit to a piercing. An ear cuff fills the gap and brings a little rock and roll to a look. Switch from a wrist to a pocket watch for a hint of nostalgia or steampunk. Even shoes can be easily styled with metal shoe clips, silver for black shoes, and gold for brown.
A belt, watch, and tie are only the beginning. Whatever the desired impression, there are more accessories available than ever to help men achieve it.
Updated on January 23, 2018
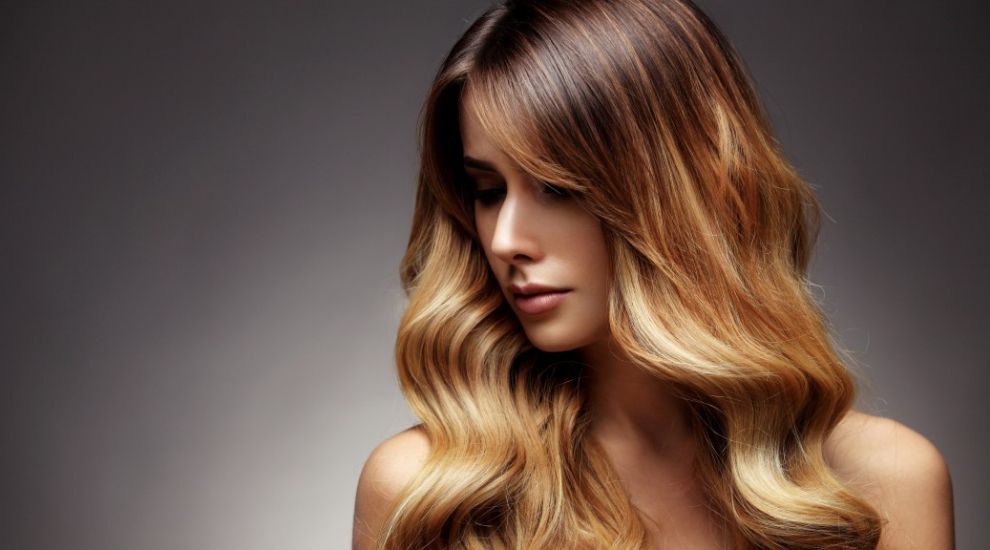
6 Tricks to Growing Long Hair
A healthy mane of hair can make even a simple outfit stand out. Here are some tips on how to grow long hair.
Remember that it will not grow overnight – Healthy hair will only grow a quarter of an inch to half and inch every month. Therefore, growing out your hair will take some patience.
Trims – Although trimming your hair will not make it grow any faster, you will prevent spilt-ends that will work their way up your strands. Spilt-ends can also cause your hair to break, making it shorter than the rest of your stands. Ask your stylist to take off 1/8th of an inch every 10-12 weeks.
Use conditioner every time you shampoo – Conditioner will help your hair ends replenish lipids and proteins that are lost when coloring and heat styling your hair.
Don’t shampoo every time you shower – Shamooping often will remove all the natural oils that build-up on your scalp that help your hair grow. Instead, shampoo once or twice a week and condition every time you shower.
Apply an oil or mask treatment weekly – Hair that touches your shoulders can be several years Therefore condition your hair weekly with a moisture based oil or hair mask. It is best to wet your hair, apply the mask and then shampoo and condition your hair as normal.
A balanced diet– Look at eating a balanced diet that is full of fresh vegetables, meats, and fruits. Avoid processed and packed foods, as they are full of chemicals that can create hormonal imbalances that can affect hair growth.

Updated on January 23, 2018
Why Cosmetic Surgery is So Prevalent and Popular in the United States
Let’s be honest, the words “plastic surgery” have become a household phrase that’s become quite common.
Now, in the past, reconstructive surgery was predominantly performed to restore facial features after an accident. During both World Wars (I & II), plastic surgery was only performed on those that had fallen victim to the scars of war. Cosmetic surgery was only accessible to those that had the money and to celebrity figures.
Technology has advanced tremendously over the past years and now it’s become available at a much lower cost, with less of a risk. This might be one of the reasons why it has become so much more popular, but it’s definitely not the only one.
Social Trends
The rise of plastic surgery has been directly related to social media – at least in today’s century. The fact that people can communicate so efficiently at a back-and-forth rate and the ability to share photos has become one of the most common daily activities – as well as influences. And, you already know how infatuated people can become with others that have “the perfect face or figure”.
Unhappiness and Discomfort in One’s Own Skin
Another popular reason why plastic surgery is so popular is that people just simply don’t feel comfortable with the way they look. Whether their nose is too big, they have one too many wrinkles or they feel their face is a bit deformed, it gets to a point where they can’t take it anymore – therefore leading to cosmetic surgery. Whatever the case may be, any small fragment of unhappiness or self-doubt can easily be fixed by picking up the phone and scheduling an appointment at the nearest surgeon.
Article submitted by Dr. Jan Zemplenyi. Dr. Jan Zemplenyi and the Bel Red Center for Aesthetic Surgery focus on patient care and the best possible outcome.
Updated on January 23, 2018
6 Effective Tips for Healthy Hair
 Thick, shiny, bouncy hair can be an asset and look good with any outfit. Although styling your hair can help you make your hair look and feel healthier, there is nothing like ensuring your hair is at its best naturally. Here are six effective tips to healthy hair.
Protect your hair – Always protect your hair from sun, rain, and wind. Excessive exposure to the elements can cause damage due to heat, dirt, and pollutants. When out in the sun always cover your hair with a hat or limit your exposure.
Wet hair – Wet hair is fragile and can easily break. Always be gentle when shampooing your hair and avoid brushing your hair when it is wet. Buy a wide toothed comb to comb your hair to help it dry faster and reduce your styling time.
Conditioning – Conditioning after every wash is a great way to reduce frizz and ensure that your hair is moisturized after you shampoo.
Condition the right way – Remember that you don’t need conditioner on your scalp, so apply your conditioner two inches away from your scalp.
Use the same brand of shampoo and conditioner – The same brand of shampoo and conditioner are formulated to give you the maximum benefits. Consider your hair type and your requirements before selecting a brand.
Be cautious of heat – Heat on your hair will strip moisture and increase frizz. Look at only styling your hair when necessary or find a style that requires less heat.

Updated on January 23, 2018
5 Tips for Fall fitness

Young woman stretching before running in the early evening in the autumn
Fall is a great time to start a new routine and re-work your workout plans. Here are five tips that will help you get started.
Enjoy the foliage – When you enjoy nature, you may find that your exercising feels like a lot less work. Research park trails and safe areas that are suitable for a hikes, bike rides or a run and look at a new route every few weeks.
Layer up – Outdoor activities will require breathable, moisture-wicking clothing. Although these fabrics may feel cool at the start, once you are a few minutes into your workout you may notice that your body will quickly warm up.
Be safe – Shorter days means that the mornings and evenings will be darker. To ensure that people can see you, invest in reflective clothing and a flashlight to illuminate your path.
Learn something new – Learning something new, can be a great way to energize your workout plan. If you have always been interested in boxing, tap dancing or yoga, this is the time to give it a try.
Work out at home – If you feel that your days are short and you can’t find the time to head out to the gym. Look at working out at home for 20-30 minutes a day. Invest in a few fitness DVD’s or look on YouTube for workout videos that will get your blood pumping. If you want to challenge yourself and gain some muscle, invest in kettlebells, barbells or resistance bands.
Updated on May 24, 2017
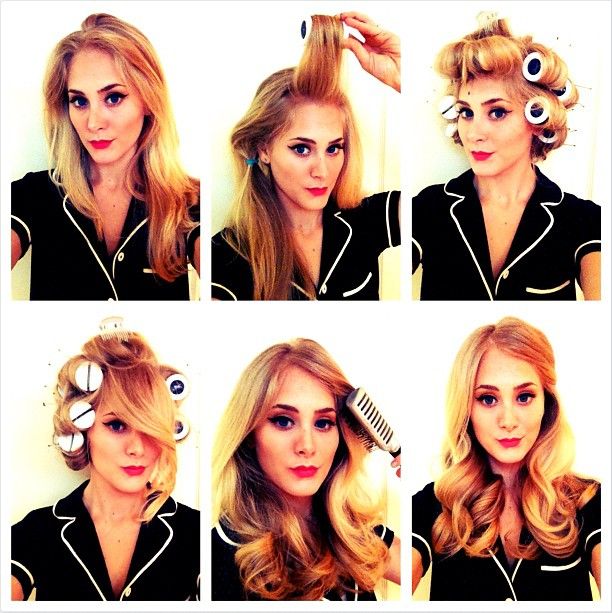
Tips on Using Hot Rollers
Article Written by : The Jewelry Review
Although a curling iron is an essential hair curling tool, it’s not always possible to get the look you want. So how do you get beautiful curls without using a curling iron? The answer is hot rollers.
Hot rollers can be used to add volume to your hair, create a foundation for up-dos, and add soft curls. If you’re not familiar with how to use hot rollers, don’t worry. The professionals at one of the leading makeup schools in Florida can help. Cosmix Inc. offers the following tips on how to use hot rollers to get the look you want.
Build a solid foundation. Before you put on the hot rollers, it’s important to prepare your hair. First, brush and detangle your hair. Next, section your hair beginning at the front section. The secret is to create parts that match the diameter of the roller size.
Have patience. Most of us are used to curling irons that require no more than a few seconds to curl hair. But not hot rollers. They need more time. The key to great curls using hot rollers is to leave in the rollers long enough to work their magic. How long? Cosmix Inc. recommends leaving them in for at least 15 to 20 minutes.
Remember the details. A few finishing touches go a long way when using hot rollers. While you’re waiting for the rollers to curl the hair, spray your hair with flexible hold hairspray. When you remove the rollers, softly brush your hair using the right type of brush.
Updated on May 29, 2017
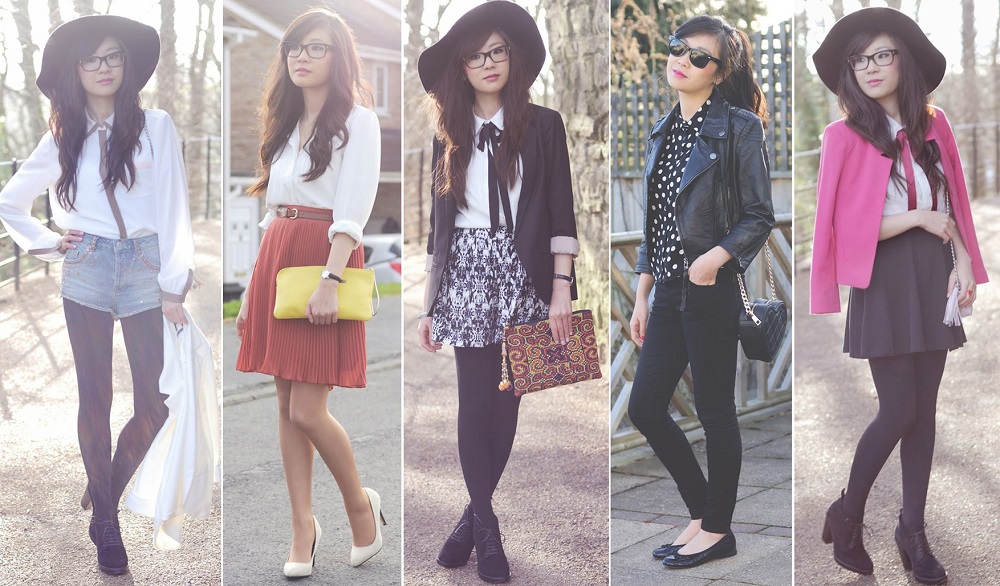
Five useful styling tips for women under 5”4
 Article Written by : A Fashionable Mind
Petite sizing has now become popular as there are some women who are below 5”4 who require clothing that is narrower around the shoulders and shorter at the seams. Sizes in petite clothing range from 00 to 16 and therefore cover a wide range of women of all sizes. To ensure petite women look their best, here are some key fashion tips.
For bustier petite’s, balance is key – If you are a bustier petite, remember to celebrate your shape. Look at empire waist skirts that show off your waist beneath your bust line.
Smaller frames – Smaller framed petites should look at kids sizes as most kids’ designs are similar to adult clothing. Take a measuring tape with you and measure your items to get a general idea of the brands sizing for kids. You could also look at items that are worn short on larger frames, but will work as a normal outfit for a petite, like a cropped top for example.
Shoes – Petites will also struggle to find smaller sizes. Look at kids shoes and shop at sales to get a hold of small sizes from older seasons.
Use layers to fake a perfect fit – If you find that an item is too big in a certain area, look at wearing layers to hide the fit.
Get familiar with easy at-home alterations – You can alter your clothes by learning a few simple sewing skills on YouTube. Small changes in the sleeves, neckline, and hem can make a big difference.
Posted on March 30, 2017
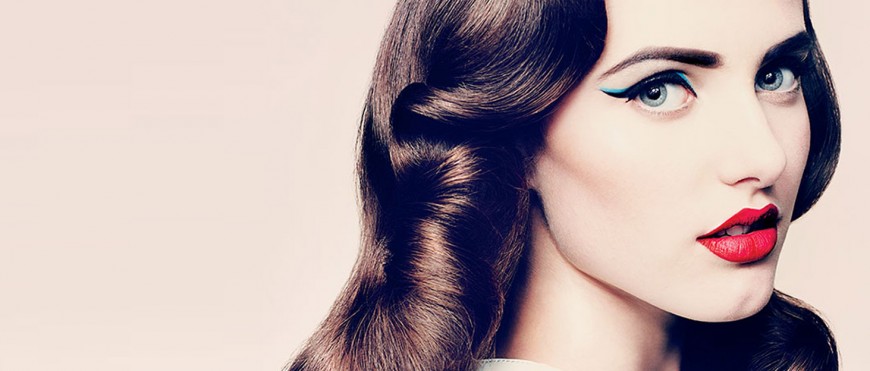
Vintage Makeup Secrets
There was a time in generations previous that makeup was one of the few ways that women of any socio-economic level could play dress up and get away from it all with a fresh coat of lipstick, mascara, and just the right accessories. Well, the classic looks never completely go away and the women that long for those days again now have reason to celebrate with the emergence of vintage makeup now featured in advertising campaigns and concrete jungles worldwide.
Dripping in Rouge
During the era of epic movie screen sirens, heavy rouge was to go-to look for actress like Joan Bennett and Jean Harlow, who preferred to lay it on thick on her cheeks for a dramatic effect that lit up a room. For a formal evening out on the town, going heavy on the rouge is a bold choice that stops everyone in their tracks.
Pencil Eyebrows
Not just the penciled eyebrows of before that were barely noticeable, but fuller and broader than every before to make those eyes truly come alive and stand out! TO get the perfect arch, follow the length of the brow until the end.
Matte Magic
For a gleamed matte appearance that would rival none other than Hollywood legend Katharine Hepburn, apply packing powder liberally across the face to make it glow. Before trying this look, be sure to exfoliate and moisturize thoroughly to achieve a finished look that is beyond flawless.
White Liner
If you are of the opinion that your eyes are not capable of mesmerizing the masses further, think again! White liner applied around the eyes will make them stand out and take you one step closer to the classic look that Lauren Bacall perfected in the glamour years of Technicolor Hollywood.
Bio: Dev Randhawa is a fashion blogger based out of the United States with a passion for hair and makeup. Follow Dev Randhawa to see the latest styles on her blog.
Updated on May 29, 2017
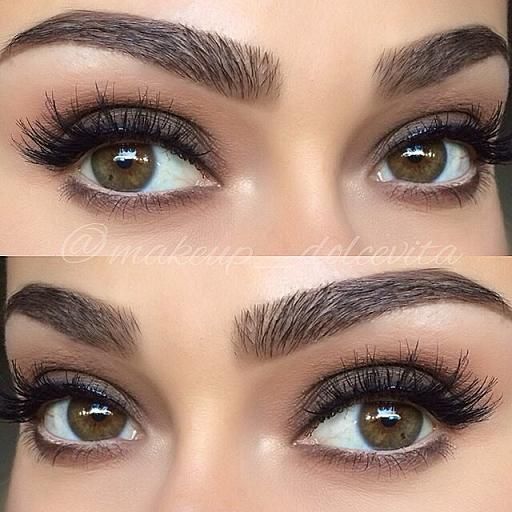
Three Tricks for Perfect Eyebrows
Article Written by : PJ Golds
Even the hottest celebrities have less-than perfect eyebrows. What is their secret? Going to the right eyebrow specialist, of course! It’s important to get your eyebrows done at least every four weeks. But the biggest secret is learning how to take care of them in between your visits. Learning how to properly brush, trim, and tweeze eyebrows will ensure that they look perfect even if you didn’t just come from the salon.
Brush your eyebrows up and down. Before you can break out the scissors or tweezers, it’s important to properly brush the eyebrow, a lesson we teach during our basic makeup classes at Cosmix Inc. Brushing the eyebrow both upward and downward helps to reveal problem areas that need to be fixed. First, brush the eyebrow upward starting at the inner brow line. Brushing your eyebrows this way helps reveal unruly hairs that are out of place. Then you will need to brush your eyebrows down, a great way to reveals any hairs that have grown too long.
Trim long hairs. In order to properly trim your eyebrows, you will need to use small scissors designed for trimming eyebrows, a spooly or flat sheers from makeup artist classes. Using the brushing technique mentioned above, brush the eyebrows upward and trim the longer hairs. Then brush the eyebrows downward and do the same thing.
Tweeze to remove unwanted hairs. Skip waxing, especially if you’re doing your own eyebrows. Tweezing allows you to remove a single hair at a time, leaving less room for error. Before tweezing your eyebrows, clean the area with 99 percent alcohol and a cotton swab. Lift the skin with your finger or thumb, and begin tweezing in this order: inner brow line, between the eyes, under the inner brow, the arch, and the outer brow.
Updated on May 24, 2017
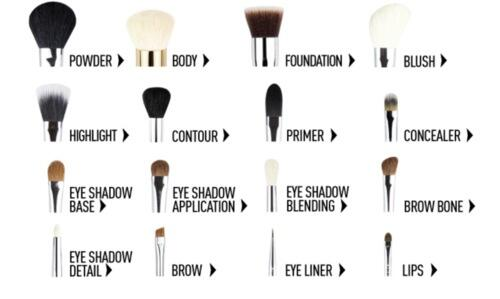
Makeup Application Tips: Know Your Brushes
Article Written by : Fashion Of The Celebs
Whether you’re a professional makeup artist or a student at one of the leading make up artistry schools, the brush is one of the most important tools in the makeup bag. Take a look at a few makeup brushes and you’ll notice that they come in all shapes, sizes, and materials. The following are a few makeup tips to learn the purpose of each type of brush and which ones you shouldn’t live without.
The Perfect Foundation
When it comes to applying flawless foundation, you will need the duo foundation brush. It’s a brush with the shape of a flame, one that works much better than simply using your fingers. If you can’t afford to purchase natural animal hair, go for a nylon or synthetic brush just works just as good. If you want to blend different powder, use a soft rounded brush. Finally, use a concealer brush to handle blemishes and dark circles under your eyes. The concealer brush is a long brush that features a tapered head.
Great Eyeshadow
Whether you’re creating the smokey eye look or applying light eyeshadow for daytime, it’s important to use the right brush when applying eyeshadow. In other words, ditch the tiny tool that comes with the eyeshadow. Instead, use a brush that is small and round to apply colors. The bristles are medium firmness, and can easily blend different shades